How to Create a Cyanotype Digital Negative
Jun 26, 2020 / Photography / cyanotype process
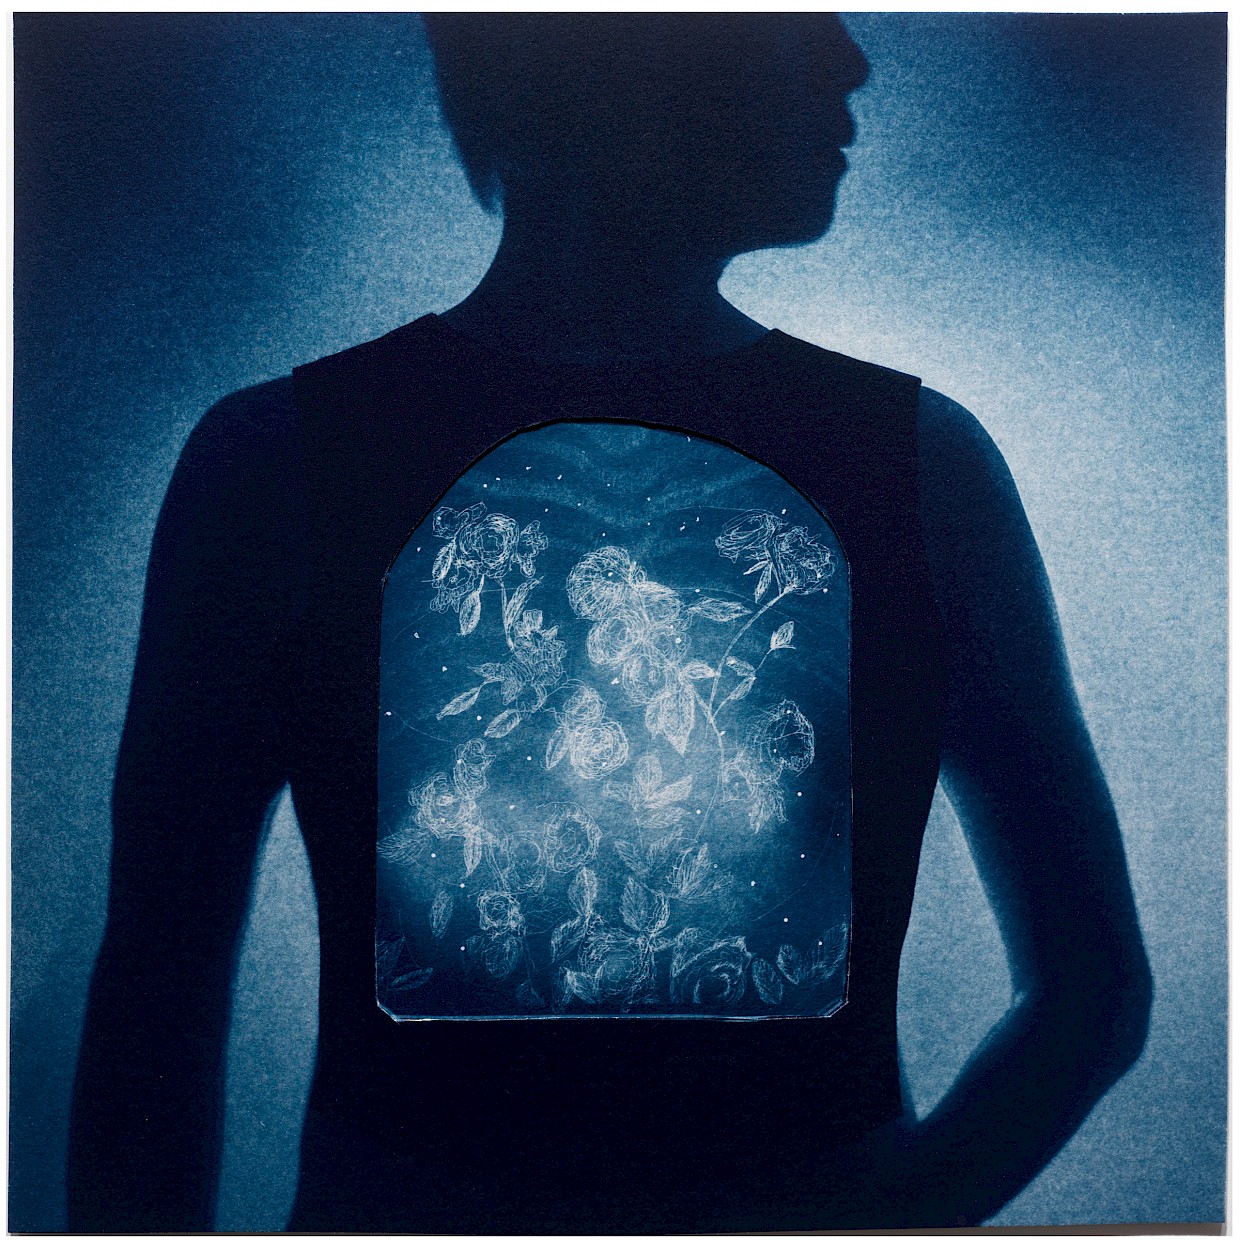
Under Armor. Toned Cyanotype with Drawing, 2020. Two print sizes. © Jonah Calinawan
“Clogged Nozzles Detected. Cleaning Recommended.”
Usually, a warning like this from my Epson 7900 inkjet printer is nothing to worry about. Run a maintenance cleaning cycle or apply the Windex method, and the clogged printheads clear right up.
But after trying to fix this problem for three weeks, I realized I was in trouble.
No matter what I did, the orange ink just wouldn’t flow. Why is this important? A clogged printhead will show nasty lines in the final cyanotype print, thus ruining the image. And, my digital negatives depend on orange ink!
Then something occurred to me.
Why not just switch to another color for my digital negatives…
In this article, I share how I create my digital negatives for the cyanotype process.
What is a Cyanotype Digital Negative?
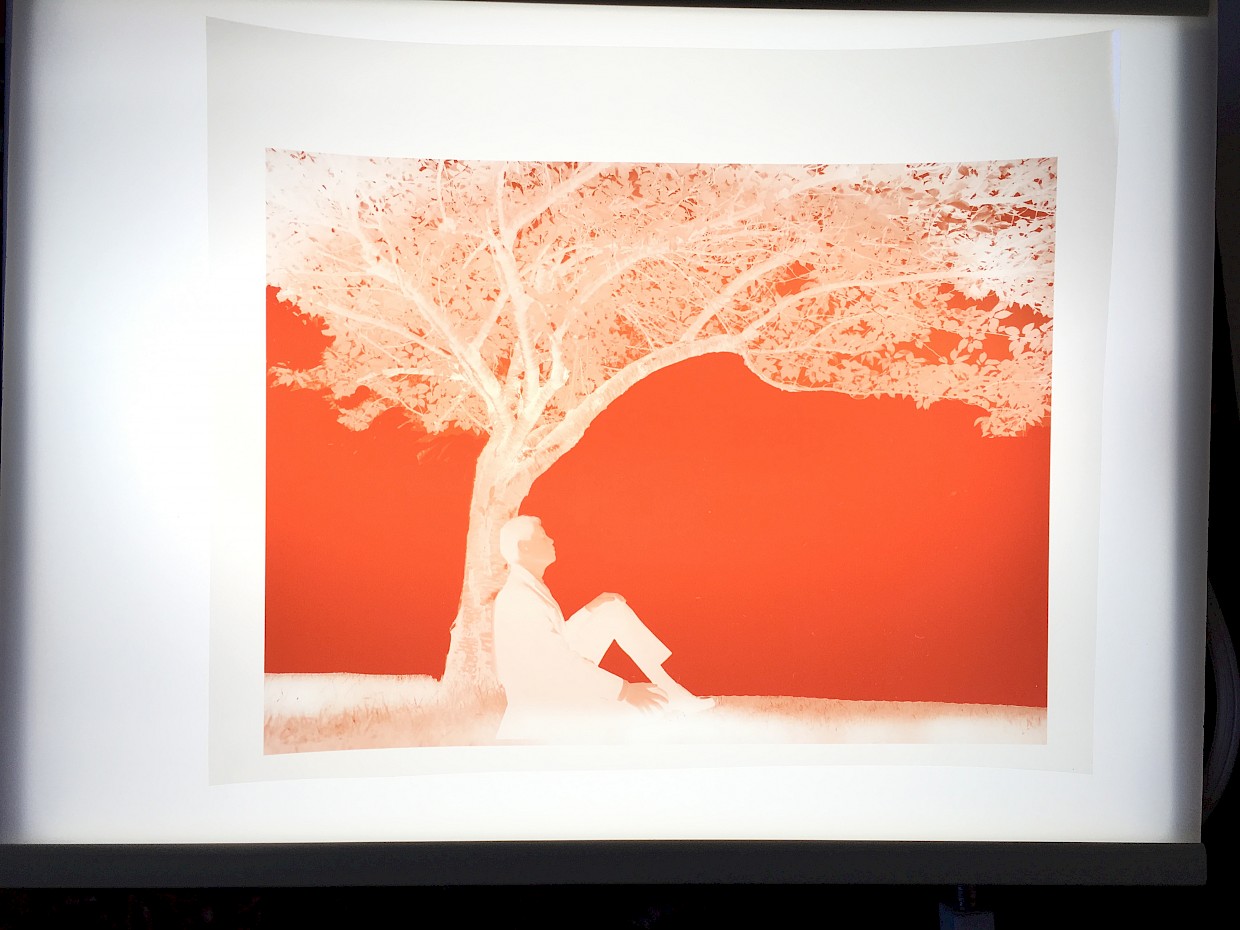
Since I use a digital camera for my photography, the only way to print an authentic cyanotype (and not a faux cyanotype from an inkjet printer) is to first print a reversed image onto an overhead transparency. Here’s a sample:
You might be thinking, “I thought cyanotypes were always cyan. So, I don’t understand why the negative is orange.” You’re right. The cyanotype print will be a Prussian blue, but the digital negative could be any color. A digital negative is equivalent to a film negative, so it’s not the actual cyanotype print.
I create the digital negative by printing a reversed image onto an overhead transparency film. I place it on top of the cyanotype paper and expose this layered “sandwich” to UV light. The cyanotype paper reacts with the UV light such that the positive image is baked onto the paper.
Creating the digital negative is a key step in the cyanotype process, and I share the method I use below.
Online Resources & Materials Needed
I learned to create digital negatives in 2011 from the brilliant minds of Kevin Bjorke and Michael Koch-Schulte.
- Michael Koch-Schulte’s Color Chart & Detailed Instructions. Unfortunately, Koch-Schulte’s original inkjetnegative website no longer exists. I’ve linked to the Wayback Machine here. I recommend you save these instructions for safekeeping.
- Kevin Bjorke’s ChartThrob Photoshop Script & Instructions
- Screenprinting Overhead Transparencies cheaper than Pictorico: 8.5x11 and 13x19 (affiliate links)
- Inkjet printer & UV lightbox
Important: If you are reading this article to create your own digital negative (and not reading it for pleasure), I recommend reading the detailed instructions from Koch-Schulte and Bjorke in #1 and #2 above. This article is more about my thought process when I use the tools they created.
Steps to Create a Digital Negative
- Determine exposure time
- Choose an ink color
- Create a color correction curve
- Fine-tune that correction curve
Step 1: Determine Exposure Time
I already wrote about this important step in a separate article, Nail Your Base Exposure Time for Cyanotype. This step ensures that you achieve the darkest shadow given all the variables in your workflow.
Step 2: Choose the Ink Color
In order to print anything onto overhead transparency, you have to choose an ink color. Any ink color will do as long as it is an effective “UV light blocker.” When I first got my printer, I searched the net for recommended inks, and red and orange were frequently mentioned. That’s the only reason I’ve been using orange until now.
To avoid the blocked printhead, I needed a new color. I don’t know if my reasoning even makes sense from an Epson color mixing perspective, but it was worth a try. I didn’t want to buy another printer or replace the printhead (which would cost as much as the printer).
Following Koch-Schulte’s instructions, I chose a preliminary color combination of (Red 0, Green 90, and Blue 30), which is a type of green. To simplify this story, I only talk about one color. In reality, I tried about 10 color combinations. Based on my experience, choosing an ink color is more art than science. It’s a hit-and-miss affair. There are (255 x 255 x 255)-1 or 16,581,374 RGB color combinations and most of these don’t work. I deduct one color combination for Red 0, Green 0, Blue 0 because that means no ink. The digital negative using this color looks like this:

Using this digital negative, the developed cyanotype print looks like this:
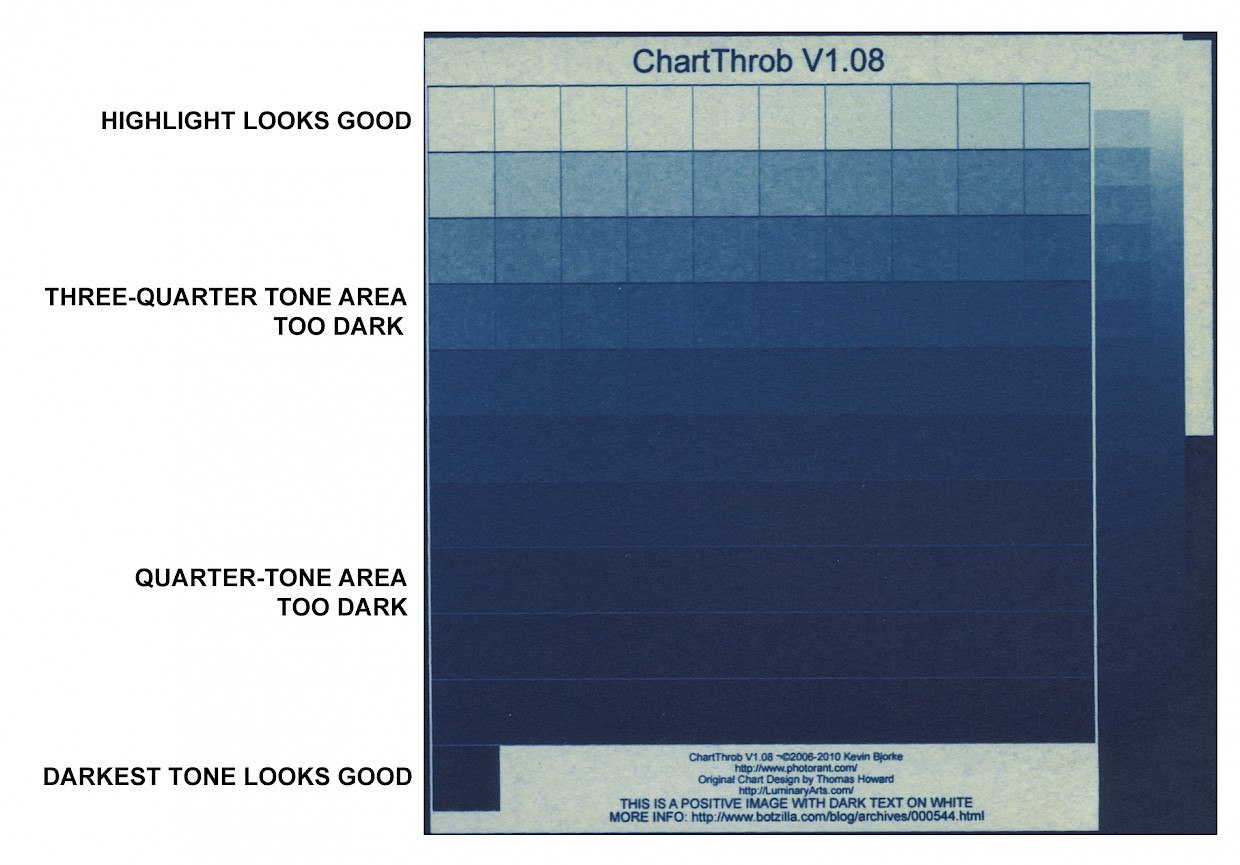
This print looks great in the highlights and the shadow. The problem is in the quarter-tone and three-quarter tone areas. They are too dark. What you want is a graduated and controlled progression from the darkest tone to the highlight. To address this problem, I needed to create a color correction curve.
Step 3: Create a Color Correction Curve
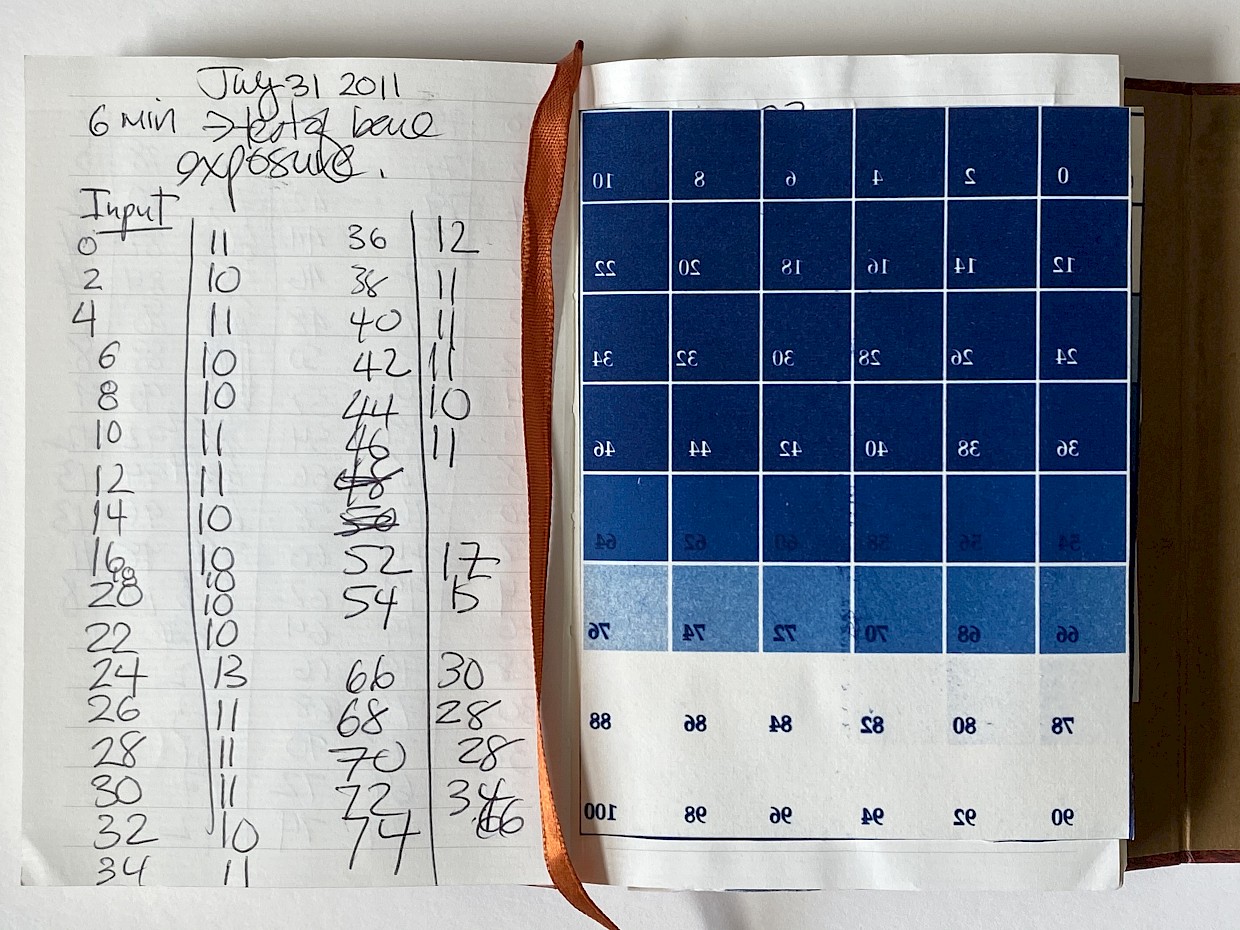
I love using ChartThrob because of this step. In the past, I did this by hand by painstakingly writing the tone values down! Here’s a page from my journal where I attempt to do that. Never again.
With ChartThrob, it takes only seconds with a click of a button. Here’s the correction curve calculated by ChartThrob:
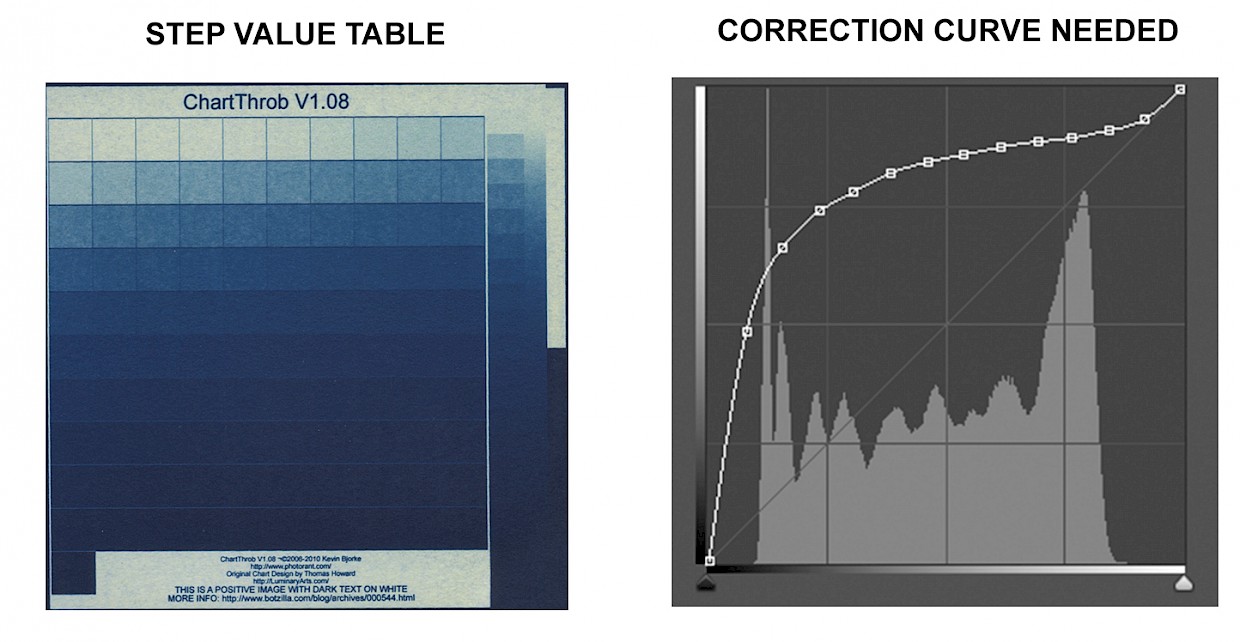
The correction curve looks very good. It’s smooth and controlled. The ultimate test, however, is whether this correction curve will produce a better step value table.
Because there are many variables throughout the cyanotype printing process (paper-to-paper variations, cyanotype chemical mix ratios, water temperature, washing time, etc.), each cyanotype will not look exactly the same—even with the same digital negative. You can control most of that variability, but you can’t eliminate it. This explains why a correction curve could never be perfect.
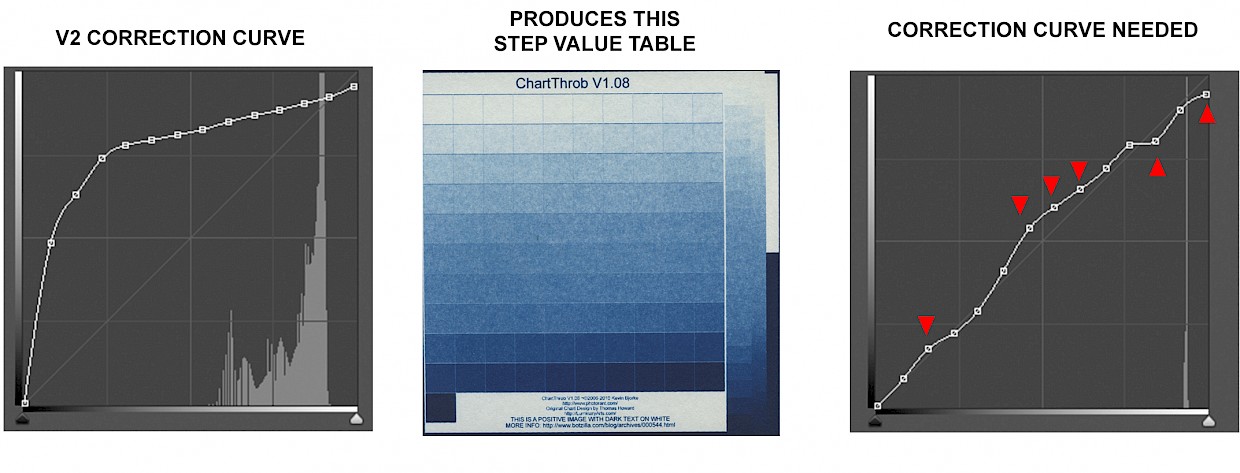
Using the initial correction curve ChartThrob calculated above, I printed another digital negative, and developed a new cyanotype:

The step value table shown above has opened up. It’s better in the quarter and three-quarter tone areas. Looking at the ChartThrob analysis (the third graphic above) indicates that this version requires further correction. I added the red triangles to indicate where corrections must be made. (If this correction curve forms a 45-degree line, then no further corrections are necessary.)
I made tweaks in these three areas and created the v2 correction curve below. The resulting step value table looks like this:
Step 4: Fine-tune that Correction Curve
The third table above still indicates problems in three separate areas. I overcompensated in the mid-tones, so I have to dial it back a bit.
You might be wondering, how do I decide by how much to adjust each curve point? In Photoshop, you can click on each point and determine the number of click steps needed to move that point towards that 45-degree line. This method is not foolproof, but it’s the way I usually start and then I iterate from there.
After making updates, I arrived at the following:
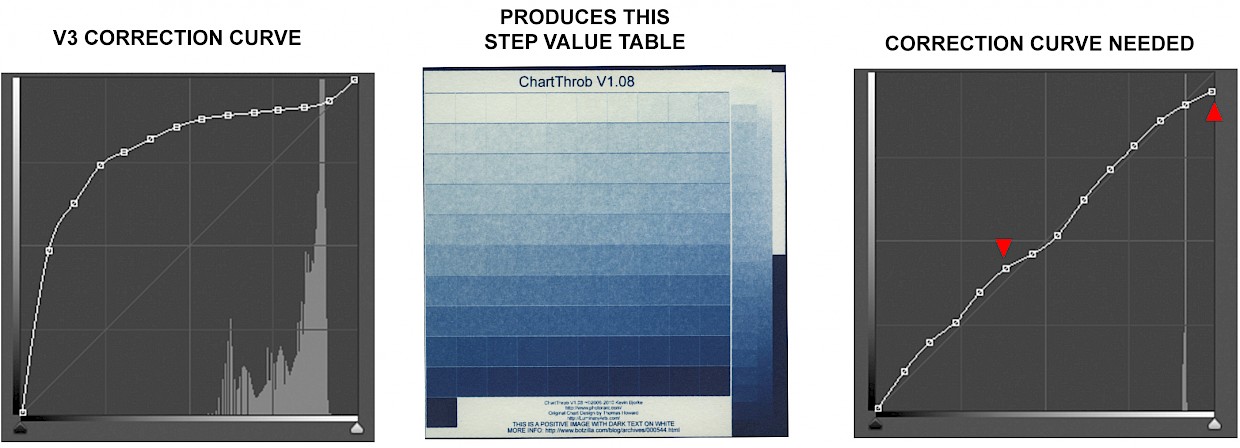
It’s better! Honestly, v3 is already usable. I could stop here, but let’s see if I can make it better. The final tweak:
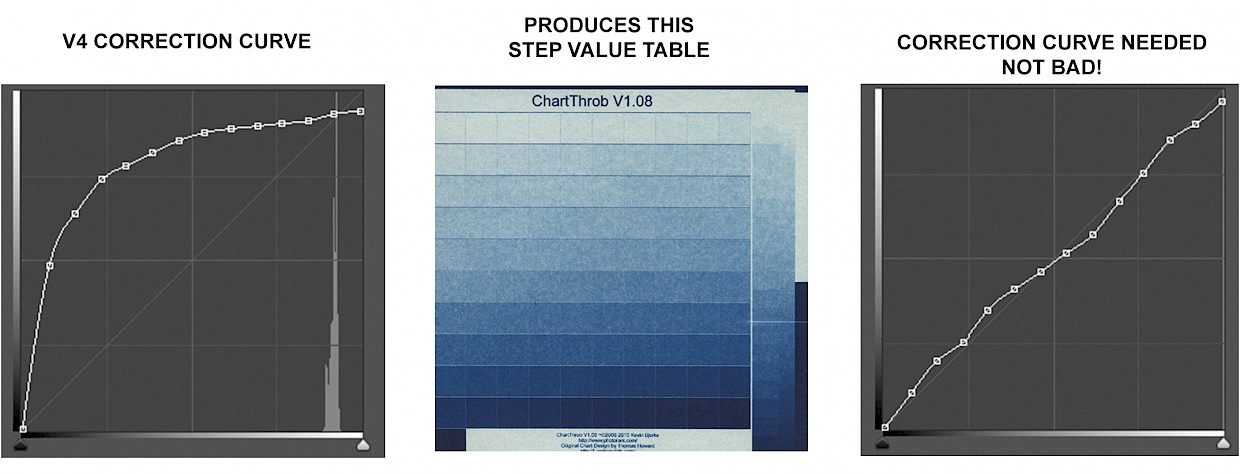
I’ll stop here. I could improve this further, but I’m happy with this v4 color correction curve.
The End
I hope you enjoyed this behind-the-scenes look at the cyanotype alternative printing process. While photography is an art, it could also feel like you’re doing a science experiment! It takes patience and experimentation, and these are some of the reasons I like it.
I successfully switched my digital negative color from orange to green! Will this help me with my clogged printhead? Gosh, I hope so.


