How to Make Cyanotypes Darker
Mar 2, 2020 / Photography / cyanotype process
In this article, we’ll talk about the process of coating your cyanotype paper. One thing I’ve learned is that how you coat paper will affect how dark it will print. Let’s get started.
Cyanotype Chemicals
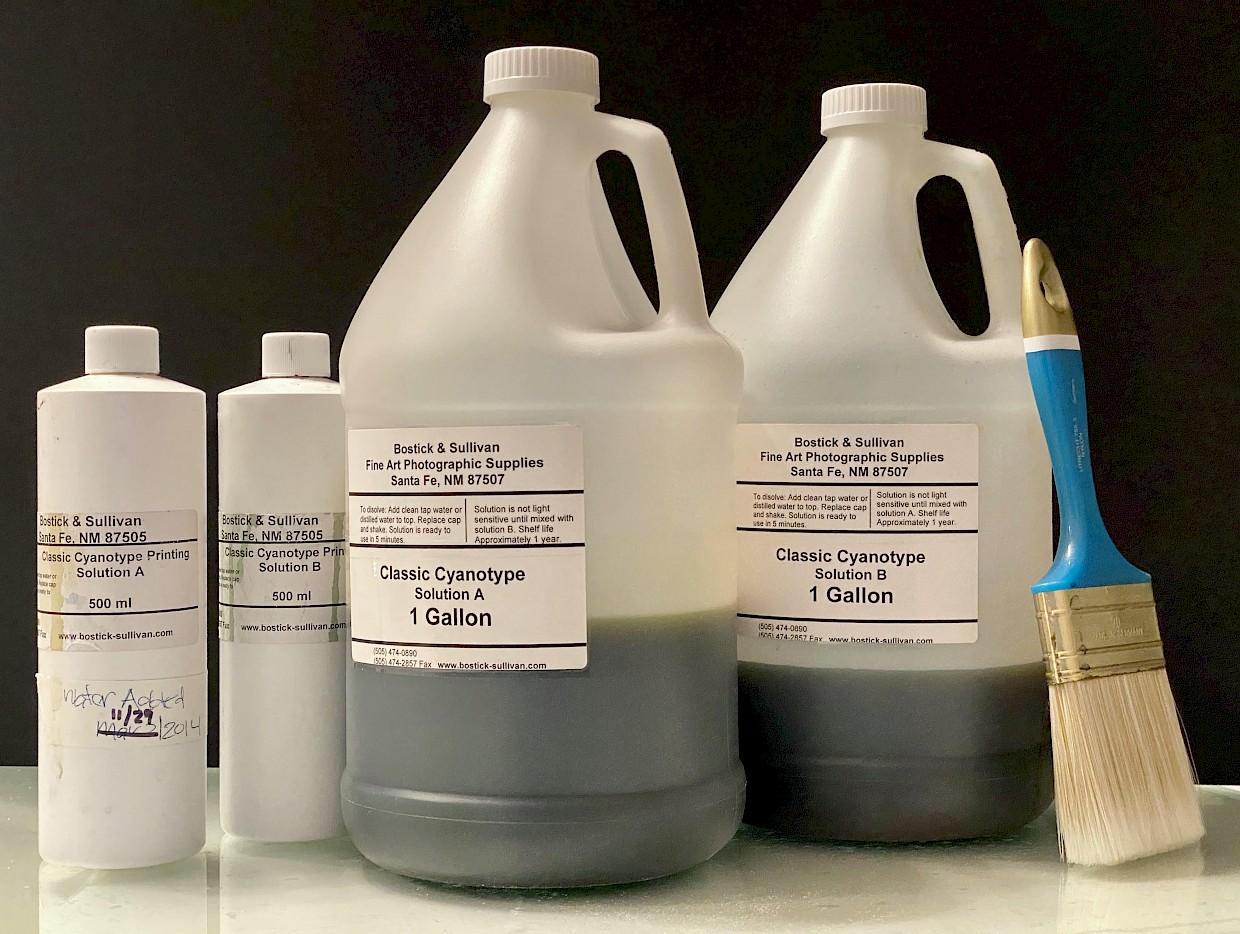
I buy my cyanotype materials from Bostick & Sullivan from New Mexico. They’re fantastic. I like their stuff because it’s convenient, add distilled water to their bottles, and you are ready to go. You could buy small bottles (250ml, 500ml, or 1000ml) or buy them by the gallon. Other sources are freestylephoto and photographer’s formulary.
Once you have purchased your chemicals and bought your paper, it’s now time to coat them for exposure.
Mixing Chemicals
I use the cyanotype classic formula and to coat a 22x30 inch Arches Platine sheet (paper recommendations here), I mix 60ml of Solution A + 60ml of Solution B (a 1:1 ratio). That’s a lot of chemicals, and you’ll see why in the next section. Part of the reason is the brush that I’m using, which is a regular 3” Home Depot brush. If you are using a brush with fewer bristles, then start with 16ml each of Solution A and B for a 22x30 inch paper coverage and see how far that goes.
Please make sure to read the instructions that come in the cyanotype package (like wearing gloves). I only mention things in my articles that are different from the instructions.
Darker Cyanotypes - Tip #1
My first tip for making cyanotypes darker is in the way you coat the paper. Here’s what I mean when I say darker:
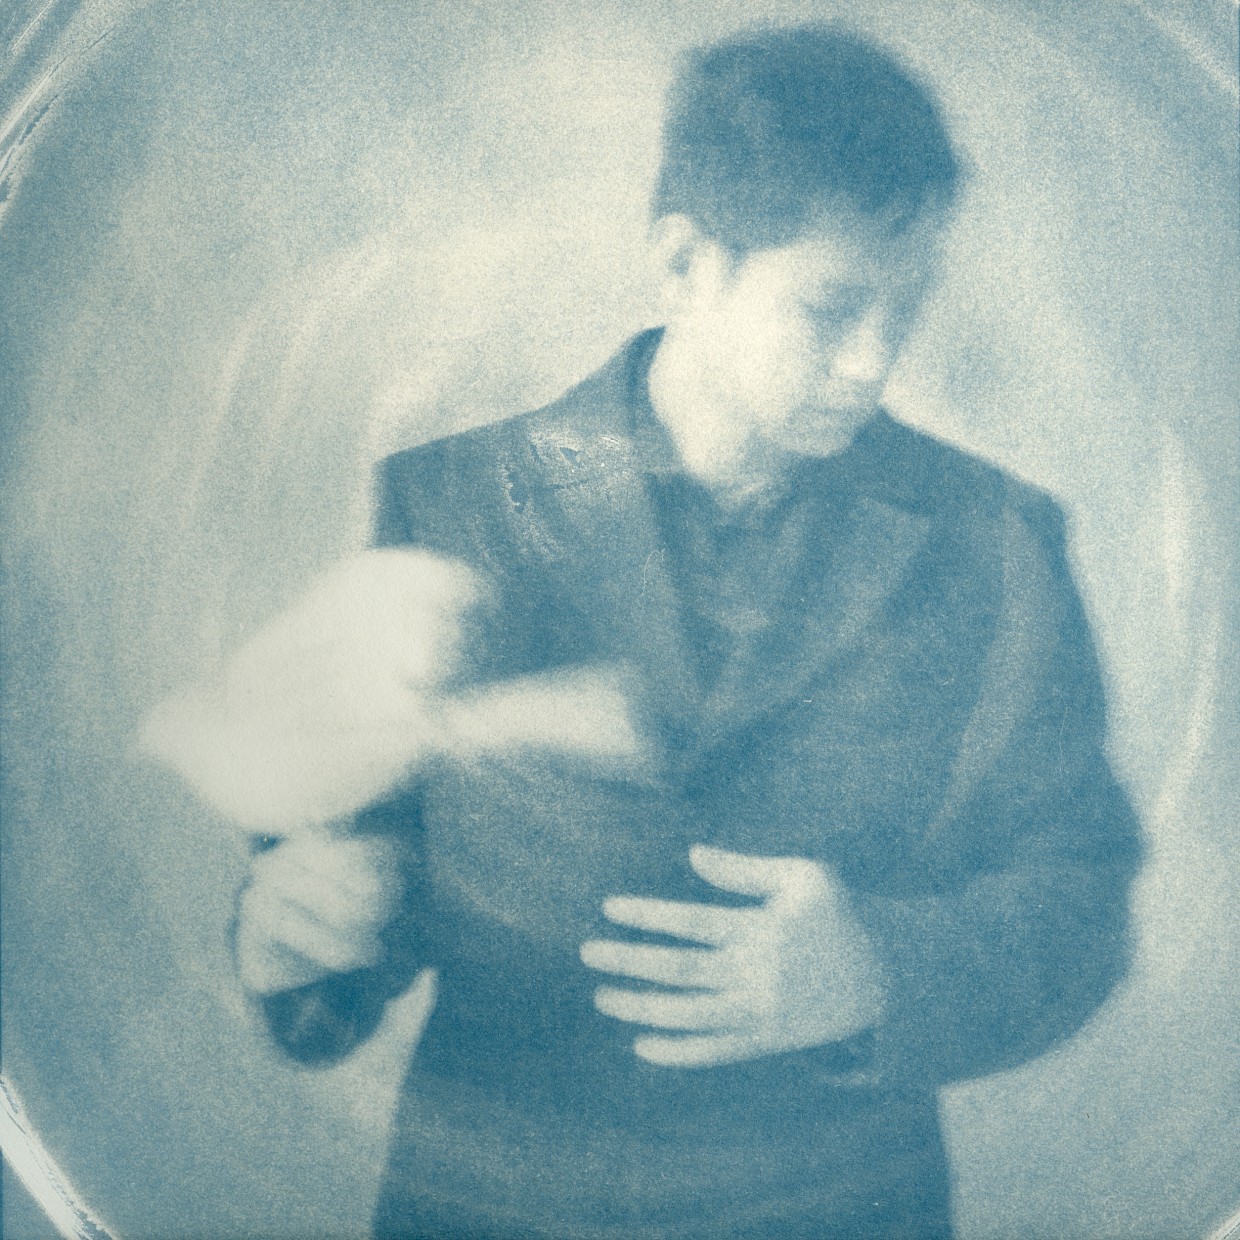
I’m talking about contrast and how much cyanotype is left on the paper after washing it. In this print, most of the cyanotype was washed off, leaving this very light impression. Imagine if parts of this were a little bit darker.
The more cyanotype on the paper, the darker it will be. This is not to say that how you apply the cyanotype on the paper is the most important consideration. It is not. Exposure time, which we’ll talk about later, is the most significant factor in my experience. Paper also has something to do with it. However, the point I’m making is that you want to optimize all factors throughout your work process.
My Application Method
I stumbled into this method when I was learning encaustics during art school. I was preparing a wood board by applying paint primer and the instructions said to apply it six times: left -> right, top -> down, diagonal-right, diagonal-left, top -> down, left->right (as shown on the video above).
At the time, I was also printing cyanotypes for another course. Without thinking about it, I applied the cyanotype emulsion in the same way.
After developing my cyanotypes, I was immediately struck by how much darker they looked. I didn’t change anything else in my work process. The shadows were darker and more solid. That’s how I stumbled into my secret method. I’ve always just done it this way ever since.
Can Darker Cyanotypes be achieved in a different way?
Yes. When I read the available literature on cyanotype processing, one suggestion is double-coating. This involves brushing cyanotype on paper, letting it dry a bit to the touch, then coating it again. I don’t like doing this because it’s too much work and time. I’ve not seen a difference compared to my method. Part of the reason my method gives a deep dark blue,once again, this is just one factor, we’ll talk about other factors later is that in effect, my method is double-coating. By brushing the paper five times, the cyanotype emulsion gets soaked into the paper fibers from every angle. The last point is the most important. The paper fiber has to be wet from every angle. Existing cyanotype literature cautions against disturbing the paper fibers when applying emulsion. As a result, beginners will overcompensate and baby their papers by brushing them in only one direction, or they touch the paper very lightly. The effect of this is that you get a lighter print. The better way is to push it to the max. I’m not saying to apply pressure to the brush as if you’re digging something. Just let the weight of the brush rest on paper and then slide it across the surface.
Pros vs. Cons of Using My Coating Method
The benefits of this coating method are darker cyanotypes and time saved compared to double-coating. A con is that sometimes you will see herring-bone brush marks on the final print. To remedy that, just back off a bit on the paintbrush pressure next time. It depends on the paper and the weight of the brush.
Hang your Coated Paper To Dry
To prevent cyanotype emulsion from pooling on the paper and ruining your print, always hang them to dry away from sunlight or a UV light source. A bathroom without windows should work. Turn on the exhaust fan and wait for 30 minutes.