How to Print Cyanotypes Darker - Tip 4
Mar 15, 2021 / Photography / cyanotype process

This article forms part of my “How to Make Cyanotypes Darker” series. In my experience, achieving the darkest cyanotypes requires four things:
1. Brushing the cyanotype emulsion correctly.
2. Nailing the base exposure time.
3. Optimizing the cyanotype digital negative curve
4. Using the full range of tones in an image.
I already wrote about the first three, and so this article tackles the fourth.
If you have done steps 1-3 above, and your cyanotypes look flat, too light, or not dark enough, then the problem might be that you are not utilizing all the tones that your printing process can produce. This last step is easy to forget, so that’s why I’m writing about it.
When I discovered photography in 2002, one of the first books I read was Dan Margulis’ Professional Photoshop. I remember his color correction advice:
“Use the full range of available tones every time, and don’t give the viewers any colors that they will know better than to believe.”
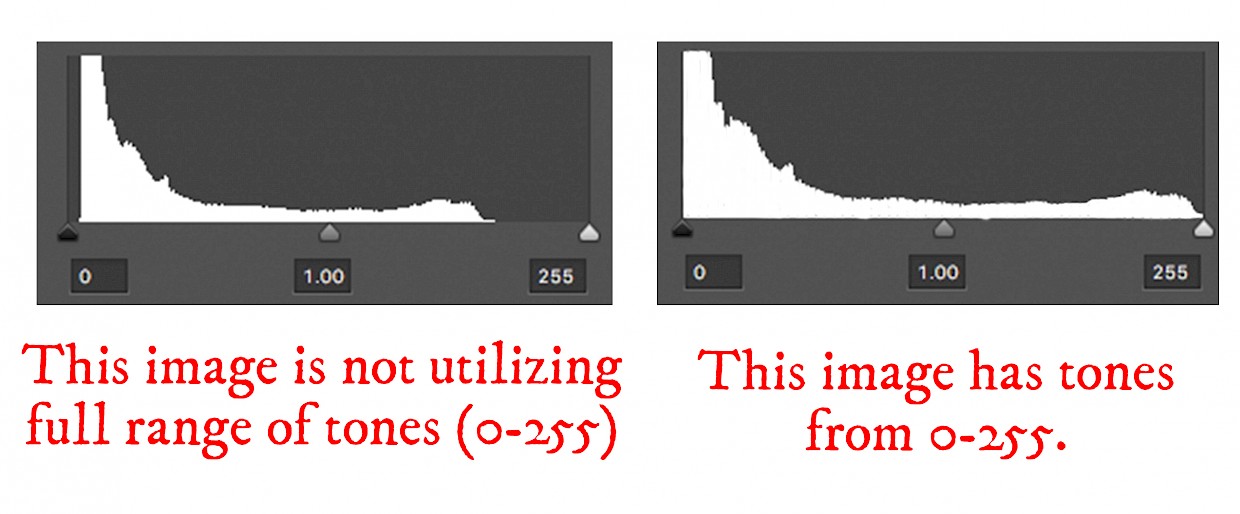
For cyanotypes, the first part of his advice is relevant: always use the full range of available tones whenever printing an image. What does that mean? It means that each image must have tonal values from 0-255 in Photoshop. Here’s what I mean:
How to Ensure A Full Range of Tones
There are many ways to ensure you are using the full tonal range with levels or curves. My process is straightforward.
Before printing the image as a digital negative, I create two layers in Photoshop: a curve and a threshold layer.
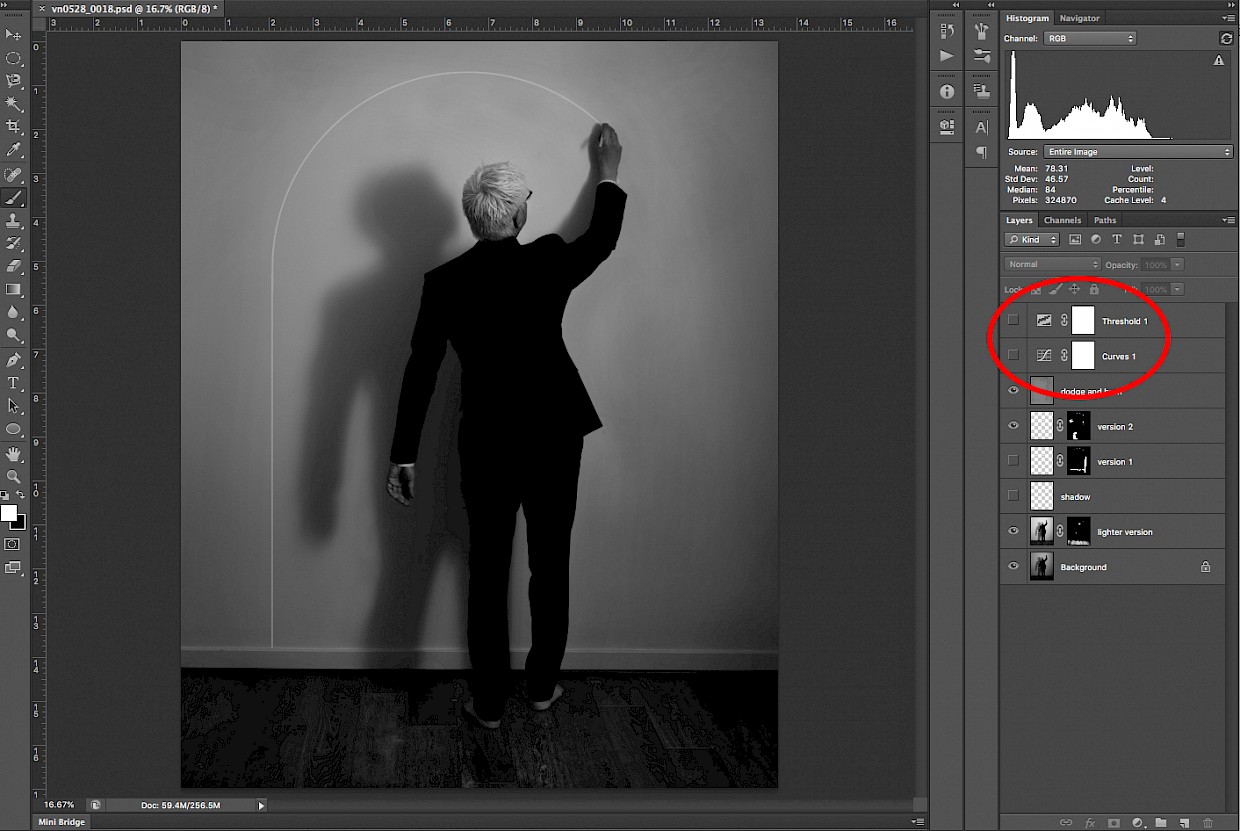
The threshold layer previews the shadow and highlight of the image that I will be printing as a cyanotype.
First, I set the threshold layer to a “0” level (i.e., shadow) and adjust the curve layer’s black endpoint until I see the parts of the image that should be the darkest show through the threshold layer as shown below. This is the most important move to make cyanotypes print darker. That black endpoint is necessary to “ground” the cyanotype and make it have “presence.”

Second, I repeat the process for the highlights. I set the threshold layer to a “255” level (i.e., highlight) and adjust the curve’s highlight endpoint until I see the parts of the image that should be the lightest show through the threshold layer. But I didn’t do that in this example because I wanted to create the highlight manually by brushing soda ash on the cyanotype later on. I will write about cyanotype toning next so be sure to subscribe.
And that’s it! Note that you are free to make further curve adjustments, like creating mid-tone contrast, but the most important thing is setting the shadow and highlight values before printing your cyanotype. Let me know how it goes!